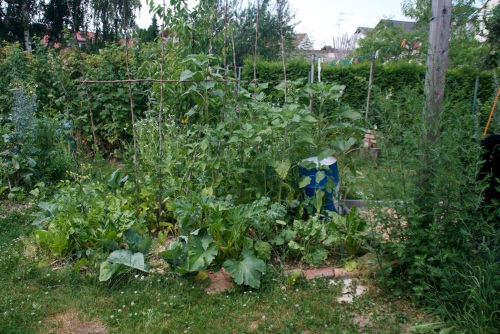
Hier nun die versprochenen Fotos unserer neuen Sheet Mulch-Beete:
Im Winter kann man den Garten gut planen, da ja sonst nicht so viel zu tun ist. Man sieht noch die Teile des linken Beets, die mal Stücke von unserem Bohnenzelt waren und jetzt mit als großes Beet zusammengeführt werden. Außerdem haben wir die zukünftigen Beete mit Steinen und Holz abgesteckt, um ein Gefühl dafür zu bekommen, wie es später sein wird.
Es ist wichtig, dass die Pappe erst aufgelegt wird, wenn der Boden wieder aufgetaut ist, da der Mulch sonst den Frost isoliert und der Boden nur sehr langsam auftaut. Am besten ist es am späten Nachmittag eines warmen Tages, damit die Wärme dann durch die Pappe gehalten wird. Ein Grund, das zukünftige Beet schon im Herbst anzulegen.
Wie man sieht, haben wir in der rechten vorderen Ecke des linken Beetes schon einen Baum gepflanzt; die Pappe wird nun um ihn herumgelegt.

Und schwupps sind die Beete fertig. Auf die Pappe kam ein wenig Kompost und dann eine dicke Lage von über den Winter kompostierten Holzchips. Und dann konnte das fleißige Pflanzen schon losgehen! Die dunkle Farbe des Holzchipsmulches hat im kühlen Frühjahr auch den Vorteil, dass sie die Erde stärker erwärmt. Die recyclete Öltonne im Hintergrund des zweiten Bildes wird übrigens mal eine Kartoffeltonne.
Wir waren nur zwei Wochen im Urlaub, aber als wir wiederkamen, war alles enorm gewachsen und die beiden neuen Beete hatten sich in Dschungel verwandelt.
Falls ihr auch Erfahrung mit Sheet Mulch habt, würde ich mich über Berichte und Kommentare freuen!
____________________________
Here the photos of the new beds:
Winter is a good time to plan your garden as there isn’t much else to do. In the lft bed you can still see the little bed snippets that were part of the bean tent last year and will be united in a big bed now.
Also, we put bricks and wood around the future beds to get a feel for how it will be later.
It is important that the cardboard is put down after the ground has thawed, otherwise it insulates the frost and the ground thaws only very slowly.
It’s best to choose the late afternoon of a warm day, so that the warmth from the day is being held in by the cardboard. A good reason to make your new bed in fall before the ground freezes.
As you can see we have planted a tree in the front right corner of the left bed; cardboard will now be put around it.

And quickly the new beds are done! The cardboard was covered with a little compost and then a thick layer of woodchips that have been lefft to compost over winter. After that the planting could start!
The dark colour of the composted woodchips also makes the soil warm up more.
The recycled oil barrel in the background of the second picture will become a potato barrel.
We were on holidays for just two weeks but when we returned, everything had grown enormously and the two new beds had turned into a jungle.
If you have any experience with sheet mulch, I’d love to hear about it!


This is the only way that I put in a new bed. Often, I put layers of organic matter and dirt directly on the sod in early spring after the ground has warmed up a bit but before any real growing has happened. This means that strongly rooted perennial weeds like dandelions and violets will eventually make their way to the top of the pile (with lots of succulent blanched growth beneath) but it is easy to take care of these few weeds if need be.
If the patch is full of something really difficult to eradicate, I usually put down a more substantial cover for longer before starting the garden.
Sometimes I put in a garden after the sod is growing which is when I put down cardboard / newspaper first to flatten the growth and inhibit emergence through the organic matter. I did learn that it was important to pierce the cardboard in several places to allow better water penetration and to make sure that I really soaked it before putting the organic matter on top.
Thanks for sharing, Ottawa Gardener! Yes, strong rooted plants can break through (my ivy still makes it here and there), but if you keep your eyes open, they’ll never become a nuisance again.
And I wouldn’t mind the dandelions and voilets, they’re edible after all and dandelions are my family’s number one bitter green. So good! 🙂
Also thanks for suggesting the piercing. I never do that but I can see how that would help a lot.