Sommerzeit – Jauchezeit! — DIY Liquid Fertilizer

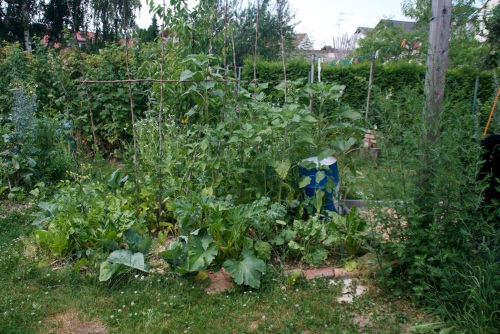
Der Beinwell und die Brennnesseln wachsen wie wild, es ist warm und bald brauchen die Starkzeher wie Tomaten ordentlich Pflanzenfutter um für uns schöne Früchte zu produzieren. Die perfekten Voraussetzungen für einen Jaucheansatz!

Man nehme:

* Blätter von Beinwell, Brennnessel, Fenchel, Kamille, Kohl, rote Beete oder einfach gejätetes “Unkraut” wie Vogelmiere, Löwenzahn oder Hirtentäschel.

* einen Eimer/Bottich/Gefäß (nicht aus Metall!), möglichst mit Deckel

* Wasser

Die Blätter werden in den Eimer gepackt (können auch kleingeschnitten werden) bis er etwa zu 3/4 voll ist. Dann das Wasser bis kurz unter den Rand hinzugießen. Deckel drauf und ca. 14 Tage warten.

Der Deckel sollte luftdurchlässig sein (es entstehen ziemliche Gärgase!), aber ich habe ganz gute Erfahrungen mit einem großen Plastikeimer mit entsprechendem Deckel gemacht, bei dem ich nur 2/3 des Rands fest angedrückt habe, damit noch ein bisschen Luft durchkommen kann.

Nach 14 Tagen (länger, wenn’s kühl ist) ist die Jauche fertig! Sie riecht sehr stark (=stinkt), dagegen hilft aber bei Bedarf etwas Steinmehl. Die Jauche wird durch ein Sieb gegossen und dann mit Wasser verdünnt (1:10 bis 1: 50) und dann zu den Pflanzen gegossen. Auf bloße Erde kann man die Jauche auch unverdünnt zur Bodenverbesserung gießen.

Die im Sieb zurückbleibende “Maische” schütte ich meist unter unsere Obstbäume.

Vorsicht, der Gärvorgang tötet die Samen der Pflanzen nicht ab. Wer also mit der Jauche nicht auch zB. Brennnesselsamen im ganzen Garten verteilen möchte, sollte die Pflanzen vor der Samenbildung nehmen.

Verschiedene Jauchen haben neben dem Düngen verschiedene Wirkungen und können auch als biologische Schädlingsabwehr eingesetzt werden. Eine ausführliche  Liste findet man hier.

_____________________________________________________________________________________

Comfrey and nettles are growing quickly, it is warm and soon high nutrient-demanding plants such as tomatoes will want their feed to grow us nice big produce. Perfect conditions for a batch of liquid fertilizer.

You need:

* leaves of comfrey, nettle, fennel, chamomile, cabbage, red beet or just “weeds” such as dandelion, chickweed, shepherd’s purse, ….

* a container (must not be made of metal), preferably with a lid

* water

Put the leaves in your container (you may cut them small if you like) until it is 3/4 full. Then add the water until a few centimeters under the rim. Put the lid on and wait for about 14 days.
The lid should let air through (there will be fermentation gases) and I have had good results with using a big plastic bucket with tight-fitting plastic lid that I only pushed down firmly on 2/3 of the rim, leaving a little space for the air to get through.

After 14 days (longer if the weather’s been cool) the liquid manure is ready! It smells quite strongly, but a bit of rock meal helps against that.
Strain your liquid through a sieve, add water to it (1:10 to 1:50) and give it to your plants. On bare soil you can also put it without dilution to improve the nutrient content of it.

The leftovers in the sieve I usually just plop under our fruit trees.

Caution! Plant seeds don’t die during the fermentation process and unless you would like to spread the plant you used all over your garden, better only use plants before they have produced seeds or only seedless parts.

Making your manure with different plants will add some other uses to it besides fertilizing and there’s a wonderfully extensive list here. It’s in German, but with machine translated, it’s still somewhat understandable and – in parts – am/confusing. I hope I get around to translating it myself sometime.

1 Comment

Filed under food, garden, Permaculture

Zwei Teiche — One Pond, Two Ponds

Ein zweiter Teich wurde nun eingerichtet und die Fische getrennt. Sie haben sich gut eingelebt und werden auch immer mutiger. Außerdem finden sich die ersten anderen Wassertiere ein. Eine rote Libelle saß gestern lange am Teich und fing andere Insekten, die zum Trinken kamen. Waffenfliegenlarven schwammen herum (bis sie gefressen wurden). Unsere
Katzen freuen sich über diese schöne Trinkstelle.
Und schließlich ist es noch unheimlich entspannend am Teich zu sitzen und ins Wasser zu schauen…

____________________________________
A second pond was built and the fish divided up. They have got used to their new surroundings and are getting bolder every day. Also, other water-loving animals are appearing. Yesterday a red dragonfly sat at the pond for a long time, hunting other sinects that came to drink. Soldierfly larvae swam around (until they got eaten).  Our cats love to drink from this new waterhole.

And last but not least it’s so realxing to sit at the pond and look into the water…

Leave a comment

Filed under garden

Fisch fish Fisch fish Fisch fish Fisch fish….

Es tut mir Leid, dass ich so lange so blogfaul war, aber ich kann schonmal ankündigen, dass wir demnächst groß umziehen und die ganze Vorbereitung nimmt viel Zeit in Anspruch.

Zum Trost jetzt aber eine lustige Geschichte und, ich hoffe, bald wieder regelmäßige Einträge.

Wir haben eine Menge sehr großer Plastikbottiche und ich liebäugelte schon seit längerem mit Teich. Und also wir dann letztens im Asialaden eine Menge essbarer Wasserpflanzen sahen, konnte ich nicht widerstehen und kaufte einige um sie in ein Aquakultur-Projekt (sprich: Teich) zu integrieren.

Da wir bald umziehen und ich mir das Graben ersparen wollte, stellte ich einfach den Bottich in einer guten Lage (Morgensonne, nachmittags Schatten) auf, legte Steine und Erde hinein und füllte ihn mit Wasser.

Dann pflanzte ich Wasserlotos (Nelumbo nucifera), Wasserspinat (Ipomoea aquatica), Wassermimose (Neptunia oleracea), Brunnenkresse (Nasturtium officinale) (das alles aus dem Asialaden) und einige weitere Teichpflanzen aus einem nahe gelegenen Teich.

Nach ein paar Tagen hatten sich die Pflanzen eingelebt und Massen von Mückenlarven hatten sich eingestellt.

Also gingen wir am Samstag los und kauften Fische gegen die Mückenlarven und Wasserschnecken gegen Algen und Pflanzenteile. Die Fische waren Elritzen (Phoxinus phoxinus) und da sie gerne mindestens zu viert sind, nahmen wir vier. Alles war gut, sie waren schüchtern, aber schienen glücklich.

Ich schärfte meinem fast drei Jahre alten Sohn ein Arme und Beine aus dem Wasser zu lassen, damit es klar und die Fische glücklich bleiben.

Doch als ich ihn für eine halbe Stunde allein ließ, schaffte er es, das Wasser komplett zu trüben und alle Pflanzen in einer Ecke schwimmen zu lassen. Ich pflanzte wieder alles ein und goß vorsichtig noch ein wenig Regenwasser dazu, doch abends sahen wir die Fische an der Wasseroberfläche nach Luft schnappen und ich hatte ein schlechtes Gewissen.
Am Sonntagmorgen lief ich hinunter um zu sehen, ob sich das Wasser wieder geklärt hatte und es den Fischen besser ging. Aber: Sie waren weg! Nirgendwo tote Fische, aber auch keine Fische im Teich zu sehen (obwohl das Wasser wieder kristallklar war), dafür ein paar glücklich aussehende Katzen.
Am Nachmittag gingen wir zu einem kleinen natürlichen Teich in der Nähe, und holten noch einige Wasserpflanzen und einige Wasserinsekten wie Rückenschwimmer (Notonecta glauca). Sie schienen sich in unserem Teich wohlzufühlen.

Am Montag machten wir eine Fahrradtour zu einem weiteren kleinen Teich und holten zwei Libellenlarven (Kleinlibellen, Zygoptera), wegen der Tausenden von Mückenlarven, die wir nicht schlüpfen lassen wollten. Mein Mann hatte am Morgen unseren Teich komplett nach Fischen abgesucht, konnte aber keine finden.

Am Dienstag habe ich gemerkt, dass es schon viel weniger Mückenlarven gab und ich war froh, dass die Libellenlarven so eine gute Arbeit geleistet hatten. Ich konnte sie zwar nicht sehen, nur die Rückenschwimmer.
Allerdings sah ich etwas anderes, ein Aufwirbeln des Schlamms am Teichboden und die Bewegung war so schnell, dass es mich an einen Fisch erinnerte. Also suchte ich den Teich nach möglichen Fischen ab, fand aber keine.
Þóra, meine isländische Gastschwester, kam an diesem Nachmittag  und zusammen mit meiner Mutter gingen wir zu einem Gartencenter in der Nähe und meine Mutter kaufte Pflanzen während Þóra uns überredete eine elektrischen Teichpumpe und ein paar kleine Goldfische zu nehmen. Wir nannten sie Adalbert und Heinrich. Nachdem wir sie ins Wasser gelassen hatten, sah ich wieder eine fischige Bewegung und diesmal auch einen Fisch. Einen grauen. Eine der Elritzen hatte überlebt! Die Fische waren glücklich mit dem Sauerstoff, den die Pflanzen zur Verfügung stellten, also ließ ich die Pumpe vorerst eingepackt.

Am Mittwoch ging ich am Morgen direkt an den Teich. Er war wieder leer! Keine Elritzen, keine Goldfische. Die Goldfische, die wir geholt hatten, waren orange und silber und ihre Farben wirklich standen stark ab gegen die Braun- und Grüntöne der Teichvegetation. Aber ich konnte keinen von ihnen sehen. Ich  ließ meine Hände durch das Wasser gleiten und versuchte die Fische damit aufzuschrecken, aber es schwamm nichts herum. Ich beschloss, mit meinem Sohn die Pumpe zurückzugeben und zwei weitere Goldfische zu kaufen – aller guten Dinge sind drei! – und den Teich nachts mit einem Drahtgeflecht abzudecken, damit die Katzen nicht an die Fische kommen. Und wenn auch diese Fische verschwanden, dann wäre es das gewesen – keine weiteren!
Wir fuhren mit dem Rad ins Garten-Center, gaben die Pumpe zurück und bekamen zwei kostenlose Luftballons und zwei Goldfische. Wir ließen sie vorsichtig ins Wasser und ich entdeckte, dass die einsame Elritze zurück war. Sie sind Schwarmfische, ich war froh ihr zwei Begleiter geben zu können. Dann ging ich für ein paar Stunden weg.
Als ich zurückkam und in den Teich sah, konnte ich nicht glauben was ich sah! Vier Elritzen tollten mit vier Goldfische herum! Ich fühlte mich sehr dumm und weiß jetzt, dass Fische sich richtig gut verstecken können. In einem kleinen Teich, während ich meine Hände hindurch gleiten lasse und obwohl sie bunt sind, können sie sich immer noch verstecken. Ich bin schwer beeindruckt. Es scheint ihnen gut zu geben und ich werde weiter beobachten, ob der Teich ihnen groß genug ist, ansonsten muss ich noch einen zweiten bauen.

Aber, welche Überraschung!

____________________________________________________________________________
I’m sorry for being so lazy about blogging lately, but I can already announce that we will move soon and since it’s a big move,  it involves a lot of preparation.

To console you, here a funny story and, I hope, more regular entries again soon:

We have a lot of very big tubs and I have been fancying a pond for quite a while now, so when we went to the Asia store the other day and saw edible aquatic plants, I couldn’t resist and bought some to integrate into an edible aquaculture project.

Since we’re moving soon and I wanted to save myself the work of digging, we just put the tub in a good location (morning sun, afternoon shade), added some soil and rocks  and filled it with water.

Then I planted the water lotus (Nelumbo nucifera), water spinach (Ipomoea aquatica), water mimosa (Neptunia oleracea), water cress (Nasturtium officinale) and some random pond plants from a nearby pond.

After a few days the plants had settled in and masses of mosquito larvae had arrived.

So on Saturday, we went and bought fish for mosquito control and water snails for algae and plant control. The fish were grey minnows (Phoxinus phoxinus) and since they like to be at least in fours, we got four. All was well, they were shy, but seemed happy.

I told my almost three year-old son to keep his extremities out of the water to keep it clear and the fish happy.

However, as soon as I turned my back for half an hour, he had kicked up silt in the pond with his feet and the water had gotten cloudy. By evening the poor fish were swimming at the surface, gasping for air. I felt so bad.

Sunday morning I ran down to see if the water had cleared and the fish were doing better agian. But: They were gone! No dead fish anywhere, but also no fish to be seen in the pond (even though the water was crystal clear again) and a couple of very happy looking cats.
That afternoon we went to a little natural pond nearby, got some more water plants and some pond bugs such as backswimmers (Notonecta glauca). They were very happy in the water.

On Monday we went for a bike tour to yet another little pond and found some dragonfly larvae (small ones, Zygoptera), too, because of the thousands of mosquito larvae we didn’t want to hatch but get eaten. My husband also had searched the whole of our little pond for fish in the morning but couldn’t find any.

On Tuesday I noticed that there were a lot less mosquito larvae already and I was happy that the dragonfly larvae had done such a good job. I couldn’t see anymore of them though, only the backswimmers.
However, I did see something stir up the mud at the bottom of the pond and the movement was so quick that it seemed almost fishy. So I searched the pond for possible fish, but found none.
Thóra, my Icelandic hostsister, came over that afternoon and together with my mum we went to a garden center nearby and my mum got plants while Thóra talked us into getting an electric  pond pump and a couple of small goldfish. We called them Adalbert and Heinrich. After we put them in the water, I saw a fishy movement again and indeed even a fish. A grey one. One of the minnows had survived! The fish were happy with the oxygen the plants provided, so I didn’t install the pump.

On Wednesday, I got up on the morning and excitedly went to the pond. It was empty yet again! No minnows, no goldfish. The goldfish we had got were orange and silver and their colours really stood out against the browns and greens of the pond vegetation. But I couldn’t see any of them. I moved my hands through the water trying to scare up any fish, but there were none. I decided to return the pump with my son and get two more goldfish – third time’s a charm! – and cover the pond with a wire mesh during the night so the cats wouldn’t be able to get to any fish. Also, if those fish disappeared, I wouldn’t get any more.

We went to the garden center by bike, returned the pump and got two free balloons and two goldfish. We put them into the water and discovered that the single minnow was back. They are swarm fish, so I was happy to give them two companions. Then I went away for a few hours.
When I came back and looked into the pond, I couldn’t believe what I saw! Four minnows happily frolicking with four goldfish! I feel very stupid now and I guess fish can hide REALLY well. In a small pond with my hands moving around and being gaily coloured, they can still hide. I’m amazed. They are fine and I’ll see if they’re ok being so many in one pond and if not we’ll have to make a second one.
Talk about surprises!

Leave a comment

Filed under Animals, garden, Permaculture

Essbare Bodendecker — Edible Groundcover

Vor kurzem ist jemand mit den Suchbegriffen “essbare Bodendecker” auf meinen Blog gestoßen. Das fand ich interessant und dachte, darüber könnte ich ja mal schreiben….

Bodendecker sind toll – sie helfen gegen Austrocknung und Erosion, halten den Boden kühl und sind oft auch noch trittfest.
Wenn man sie dann auch noch essen oder anderweitig nutzen kann, ist es eigentlich perfekt, oder?

Hier ein kleiner Überblick über einige essbare (oder sonstwie nützliche) Bodendecker:

Neuseeländer Spinat (Tetragonia tetragonioides): Dieses bei uns einjährige Blattgemüse sät sich selbst aus. Bodendeckend bleibt er aber nur, wenn man ihn regelmäßig beerntet, sonst bildet er aufsteigende Triebe, die bis zu zwei Meter hoch werden! Er hat sehr fleischige Blätter und ist daher nicht trittfest. Er ist eher etwas für sonnige Standorte.

Portulak (Portulaca oleracea): Wie der Neuseelandspinat sät auch er sich selbst aus und hat fleischige Blätter. Die Blätter sind kleiner, aber trotzdem sehr lecker. Er ist auch eher etwas für sonnige Standorte. Portulak bleibt auch ohne Ernten klein, ist aber auch nicht trittfest.

Kapuzinerkresse (Tropaeolum majus): Kapuzinerkresse verteilt sich auch schön auf dem Boden und sät sich ebenso begeistert selbst aus. Hier wird man auch noch mit hübschen Blüten belohnt und kann nicht nur Blüten und Blätter essen, sondern auch die unreifen Samenkapseln als Kapern-Ersatz einlegen. Auch nicht trittfest.

Gundermann (Glechoma hederacea): Gundermann ist ein wunderbarer Bodendecker – er bleibt klein, ist einigermaßen trittfest (keine Pflanze für einen viel benutzten Weg), wächst fast überall (sicher auch unbemerkt in deinem Garten) und hat hübsche violette Blüten. Die Blätter haben einen sehr intensiven Geschmack und machen sich gut in Kräuterbutter. Gundermann vermehrt sich fröhlich selbst schlägt beim Wachsen immer mal wieder Wurzeln, so dass man ihn gut über Ableger vermehren kann.

Scheinerdbeere (Potentilla indica): Auch sie breitet sich schnell selbst durch Ableger aus und ist trittfest. Sie hat kleine gelbe Blüten und Erdbeerähnliche Blätter. Den Walderdbeeren am ähnlichsten jedoch sind die fade schmeckenden, aber essbaren Früchte. Martin Crawford vom Agroforestry Research Trust nutzt die jungen Blätter der Scheinerdbeere als Salat.

Walderdbeere (Fragaria vesca): Ist der Standort eher schattig, bietet sich die Walderdbeere an. Sie ist relativ trittfest, blüht schön und die kleinen Erdbeeren sind meist viel aromatischer als die großen Arten. Die Blätter können auch für Tee verwendet werden.

Himalaja-Himbeere (Rubus nepalensis): Diese Himbeerart habe ich auch in Martin Crawfords essbarem Waldgarten kennengelernt. Sie wächst auch im Vollschatten, wird bis 20 cm hoch, ist absolut trittfest und macht leckere Beeren. Außerdem ist sie nicht so stachelig wie die “normale” Himbeere.

Thymian: An warmen, sonnigen Standorten eignen sich kleinbleibende Thymianarten, die einen duftenden Teppich bilden (Thymus caespititius) und mit ihren Blüten auch noch Insekten anlocken. Relativ trittfest, hat man dann einen dichten Rasen, den man für den Küchen- und Teegebrauch auch beernten kann.

Kamille: Neben der strahlenlosen Kamille (Matricaria discoidea) gibt es auch Sorten der römischen Kamille (Chamaemelum nobilis), die kleinbleibend sind und als Rasenkamille verkauft werden. Gut trittfest und duftend.

Giersch (Aegopodium podagraria): Während die Gärtner, die Giersch in ihrem Garten haben, jetzt sicher die Hände über dem Kopf zusammenschlagen, führe ich ihn der (un-)Vollständigkeit halber mal auf. Giersch ist sehr trittfest und absolut robust. Man kann die jungen Blätter essen und wenn man ihn lässt, bildet er weiße Blüten (die aber schon mal einen Meter hochstehen). Es gibt ihn in grün und auch in panaschiert. Allerdings ist beim Giersch höchste Vorsicht geboten: Er breitet sich gerne aus und ist sehr schwer wieder “einzufangen”. Zum Glück kann man ihm ganz gut mit Sheet Mulch Einhalt gebieten.

Beeren: Es gibt viele kleinbleibende Beerenarten, wie die europäische Blaubeere (Vaccinium myrtillus), Preiselbeere (Vaccinium vitis-idaea), Krähenbeere (Empetrum nigrum), Cranberry (Vaccinium oxycoccos) und die Shallon-Scheinbeere (Gaultheria shallon).
Einige von ihnen haben allerdings ganz bestimmte Bodenansprüche (sauer, mager…) weswegen “normaler” Gartenboden meist nicht geeignet ist. Ansonsten sind sie aber trittfest und als Waldpflanzen in der Regel auch schattentolerant.

Niedere Scheinbeere (Gaultheria procumbens): Diese Pflanze ist in den Wäldern des Nordostens Amerikas heimisch. Die Blätter ergeben einen leckeren Tee und die Früchte haben ein minziges Aroma. Wie die anderen Heidekrautgewächse bevorzugt auch die Niedere Scheinbeere saure Böden, ist daher eher was für moorige Gegenden.

Kriechende Mahonie: Ein weiterer interessanter Bodendecker ist die kriechende Mahonie (Mahonia repens). Sicher trittfest ist sie trotzdem eher was für Stellen, die man nicht betritt, denn sie ist ziemlich stachelig. Allerdings blüht sie im Frühjahr wunderbar gelb und zieht mit ihrem starken Duft nicht nur Bienen an. Die Beeren sind essbar, allerdings sehr sauer.

Kriechender Rosmarin (Rosmarinus officinalis ‘Prostratus’): Wie der Thymian liebt auch der kriechende Rosmarin sonnige Fleckchen, bedankt sich aber mit aromatischen Blättchen, die ein tolles Gewürz sind, und mit schönen Blüten. Bedingt trittfest und vom Boden her meiner Meinung nach anspruchslos.

Vogelmiere (Stellaria media): Eine meiner Lieblingspflanzen ist die Vogelmiere. Sie wächst gerne wo es feucht ist, gerne auch ein wenig schattig und breitet sich dort auch gerne aus. Sie schmeckt saftig, erdig und lecker, steckt voller Vitamine und Mineralien und ist auch medizinisch nutzbar. Wie der Name schon sagt mögen sie auch Vögel. Da sie sehr fleischig ist, nimmt sie es einem übel,wenn man sie häufig betritt.

Breitwegerich (Plantago major) : Ihn kann man direkt auf den Weg pflanzen – er wird nicht umsonst Wegerich genannt. Mit seinen essbaren Blättern und seiner großen Heilkraft gehört auch er zu meinen Lieblingspflanzen. Er wächst auch auf trockenem harten Boden und ist eine der Pionierpflanzen, wenn es gilt “Erdwunden” zu besiedeln.

Beinwell: Beinwell reichert den Boden mit Stickstoff an und seine im Überfluss wachsenden Blätter sind toller Mulch und gut für Jauchen. Die Zwergformen (Symphytum ibericum) bleiben recht klein, sind aber nicht sonderlich trittfest. Dafür wachsen sie eigentlich überall. Beinwell breitet sich über Wurzelstückchen aus, aber wenn man in seiner Nähe nicht umgräbt (oder Mäuse und Maulwürfe hat), bleibt er wo er soll.

Nun hoffe ich einen kleinen Überblick und neue Inspirationen zum Thema Bodendecker gegeben zu haben. Habe ich was vergessen? Habt ihr noch interessante Bodendecker?

Edit: Dank meiner aufmerksamen Leser hier noch zwei Bodendecker, die ich selber im Garten habe und lieber, aber dennoch vergessen hatte:
Waldmeister (Galium odoratum), Blätter bis zur Blüte für Maibowle; Vorsicht, enthält Cumarin.
Duftveilchen (Viola odorata), Blätter und Blüten essbar, wunderbarer Duft.

_________________

Recently somebody found my blog using the terms “edible ground cover” in his search. I found that very interesting and decided to write something about it…

Groundcover is great – it helps against evaporation and erosion, keeps the ground cool and often you can even walk on it.
And if you can then also eat it or use it for something, it’s perfect, right?

Here a little overview about edible (or otherwise useful) groundcover plants:

New Zealand Spinach (Tetragonia tetragonioides): In temperate climate only annual this groundcover plant with edible leaves reseeds itself happily. It only stays a groundcover, however, if you harvest it regularly, otherwise it forms erect shoots that can grow up to two meters! NZ spinach has very succulent leaves and stems and therefore shouldn’t be stepped on. It’s something for sunny spots.

Common Purslane (Portulaca oleracea): Like the NZ Spinach it also reseeds itself and has succulent edible leaves. Those are smaller but nevertheless delicious. Purslane is happy in sunny, moist spots and stays low even without harvest. Shouldn’t be stepped on.

Nasturtium (Tropaeolum majus): Nasturtiums like to sprawl and will reseed itself. It doesn’t only have edible leaves, but also beautiful edible flowers that will add both beauty and spice to your salad! Even the unripe seedpods can be used as a pickled caper substitute. Not to be stepped on.

Creeping Charly (Glechoma hederacea): A wonderful ground cover – it stays small, is pretty tolerant to being stepped on, grows almost everywhere and has beautiful purple flowers. The leaves have a very strong taste and are nice in herb butters. Creeping Charly propagates itself happily by taking root here and there where it touches the ground, so you can easily layer it.

Mock Strawberry (Potentilla indica): It also likes to take root along its way and will spread quickly. It can be stepped on and sports little yellow flowers and strawberry-like fruit that are bland but edible. Martin Crawford of the Agroforestry Research Trust recommends the young leaves for salads.

Forest Strawberry (Fragaria vesca): Is the spot for your future ground cover rather shady, forest strawberries will do well. It can be stepped on, has pretty flowers and will reward you with tiny strawberries that are usually a lot more aromatic than any big one you can find! The leaves can also be used for tea.

Nepalese Raspberry (Rubus nepalensis): I first met this kind of raspberry in Martin Crawford’s edible forest garden in Devon, England. It grows even in full shade, gets only up to 20 cm high, is absolutely tolerant to being stepped on and makes delicious berries. And what’s best: It’s not as prickly as the common raspberries!

Thyme: Sunny, warm spots are great for thyme and varieties that stay small (Thymus caespititius) will form a lovely smelling carpet and attract pollinators with their little flowers. Relatively tolerant to being stepped on, thyme creates the sort of lawn that can be harvested for kitchen and medicinal use.

Chamomile: Apart from the pineapple weed (Matricaria discoidea) there are also kinds of the Roman chamomile (Anthemis nobilis) that stay small and are being sold as “lawn chamomile”. Can be stepped on and smells good.

Ground ivy (Aegopodium podagraria): While the gardeners amongst you who have it in their garden are probably shaking their heads now, I will still mention the ground ivy. It is very tolerant to being stepped on and absolutely robust. You can eat the young leaves and if you let it it flowers nicely (but grows then up to 1 meter high). The “wild form” is green, but there are also variegated varieties. Watch out though, ground ivy likes to spread like mad and if you once let it get out of control, it’s hard to get rid of. Luckily it’s well to deal with if you use sheet mulch.

Berries: There are many prostate kinds of berries such as the European blueberry (Vaccinium myrtillus), lingonberry (Vaccinium vitis-idaea), crowberry (Empetrum nigrum), cranberry (Vaccinium oxycoccos) and shallon (Gaultheria shallon).
Some of them have very specific requirements as to where they like to grow (acid soil, …), so “normal” garde soil often doesn’t suit them. Otherwise they’re ok to walk on every now and then and being forest plants often also shade-tolerant.

Wintergreen (Gaultheria procumbens): Winterberry is a native to Northeast America. The leaves make for a nice tea and the fruit has a minty flavour. Just like other heather family plants, winterberry also prefers acid soil.

Creeping mahonia: Another interesting groundcover is the creeping mahonia (Mahonia repens). It doesn’t mind being stepped on, but since it is quite prickly I wouldn’t recommend it. It flowers beautifully in spring and the strong scent and yellow blossoms area bee magnet. The berries are edible, but very tart.

Creeping rosemary (Rosmarinus vulgaris ‘Prostatus’): Just like thyme, rosemary is something for sunny spots. The aromatic leaves are a great spice, however, and it has pretty blueish blossoms. Nothing for paths, but otherwise pretty easy to keep.

Chickweed (Stellaria media): One of my favourite plants is chickweed.  It likes to grow in moist and also shady areas and likes to spread. Chickweed tastes juicy, earthy, fresh and delicious, is full of vitamins and minerals and Susun Weed recommend some medicinal use for it, too. The name also tells you how much birds love it. Shouldn’t be stepped on much.

Greater plantain (Plantago major): You can plant it right in the path, it’s so hardy! Its edible leaves and its amazing medicinal value make it also one of my favourites. It is a pioneer plant that comes to “heal” disturbed ground, so it can even grow in dry compacted soil.

Comfrey (Symphytum sp.): Comfrey is a nitrogen-fixer and its abundantly growing leaves are great for mulch and compost teas. S. ibericum stays small, but none of the comfreys is very happy about being stepped on. However, they grow pretty much everywhere. Comfrey can spread like mad by root cuttings, but as long as you don’t dig in its vicinity (and as log as the cats keep a check on mice and moles), it stays where it should.

I hope you enjoyed this little overview over edible ground covers! Do you know any other interesting ground covers?

NOTE: I live in a temperate climate. So any time I write “warm and sunny” I am talking about warm and sunny in a temperate zone. If you’re living, for example, the south of the US, a plant that I described as loving it warm and sunny might prefer partial shade. Ask your neighbours, friends, local nurseries or consult a book before planting!

Edit: Thanks to my faithful readers, here two more groundcovers I have in my own garden and love, yet forgot:

Woodruff (Galium odoratum), leaves until flower for May wine; watch out, contains cumarin.
Violet (Viola odorata), leaves and flowers edible, lovely scent.

7 Comments

Filed under food, garden, Permaculture, Uncategorized

Ich tausche gerne! — I love to trade!

Vor etwa einem halben Jahr habe ich durch Zufall wieder mal eine interessante Seite im Internet entdeckt: Tauschgarten. Dort werden von den Mitgliedern fleißig Pflanzen und Samen hin und hergetauscht. Bisher fand ich solche Tauschseiten zwar praktisch, aber ich hatte wenig, das ich hätte anbieten können und meist fand ein 1:1-Tausch statt, bei dem ich nur mit einer Person direkt etwas hätte tauschen können.
Tauschgarten jedoch ist anders: Man stellt Artikel (Samen, Pflanzen, Gartengeräte, Bücher, etc….) ein und wenn jemand einen Artikel anfordert, erhält man ein Ticket, mit dem man bei einer beliebigen anderen Person Artikel erstehen kann. Spielgeld im Prinzip. Die “Preise” sind niedrig, in der Regel wechseln die Artikel für ein Ticket den Besitzer – bei raren oder teuer zu verschickenden Artikeln sind es auch mal zwei Tickets oder mehr.
Das Porto bezahlt der Anbieter in der Regel selbst, aber da man ja selbst auch bei anderen anfordert, gleicht sich das wieder aus. Außerdem halten sich die Versandkosten dank so genannten Warensendungen, mit denen man bis zu 500 g schwere Päckchen zu günstigen Preisen verschicken kann, ohnehin in Grenzen.
Ich habe mit meinen wenigen Samen angefangen zu tauschen und konnte schon bald Pflanzen erstehen, die ich schon lange gesucht hatte. Die ich in Gartenversänden für viel Geld gesehen hatte und mir nicht leisten wollte. Klasse!
Jetzt bin ich fleißige Tauschgärtnerin und kann das Tauschgarten nur weiterempfehlen – da findet sich sicher für jeden etwas und jeder hat sicher etwas, was er eintauschen kann. Macht mit!

_______________________

Half a year ago I discovered a webpage that opened a whole new world to me: Tauschgarten.de
I had seen plant and seed trading sites before but usually only 1:1-trading where I could only trade directly with one person. Tauschgarten is different:
Unfortunately only in German, this page offers people to trade seeds, plants and garden-related items.
You offer you item and when somebody requests it, you get a “ticket” for it. This ticket you can then use to “purchase” somebody else’s item. The “prices” are usually low, a ticket per item; only items that are more rare or more expensive to ship are two or more tickets.
The “seller” bears the shipping costs, but since you also request items from other people, it keeps balanced. Also, with certain kinds of shipping offered by the German Post, non-personalized items are cheap to mail.
I started out trading seeds and soon got to request plants I had eyed for a quite a while but never bought because the high nursery prices had kept me off them. Now I got them for almost nothing at all! Amazing!
Now I’m a dedicated seed and plant trader and can only recommend you to find yourself networks like Tauschgarten and get trading! It’s fun and rewarding!

1 Comment

Filed under garden

Bienenstich – Bee Sting

Aus gegebenem Anlass werde ich hier mal ein wenig berichten, was ich mache, wenn ich von einer Biene (oder Wespe) gestochen werde.

Und um diejenigen, die auf der Suche nach einem Kuchenrezept hiergefunden haben nicht zu enttäuschen, gibt es am Ende noch ein Rezept für Honigkuchen.

Aber zunächst zum Bienenstich: Honigbienen, aber auch andere Bienenarten wie Hummeln, haben einen Stachel, mit dem sie sich wenn sie sich bedroht fühlen, zustechen.
Die meisten Honigbienenarten werden seit Jahrhunderten auf Sanftmut gezüchtet und stechen daher selten, aber wenn man aus Versehen auf sie tritt, sich vors Flugloch stellt oder sie sich aus einem anderen Grund bedroht fühlen, stechen sie gerne mal zu.

Ihr Stachel wurde ursprünglich gegen Insektenfeinde entwickelt und kann aus dem Panzer der Insekten auch ohne weiteres wieder herausgezogen und weiterverwendet werden. Wir Säugetiere haben allerdings eine ziemlich dicke Haut und so kommt es, dass bei uns nach einem Bienenstich der Stachel samt Giftblase und Nerven in der Haut stecken bleibt. Die Muskeln um die Giftblase arbeiten weiter und auch ohne Biene, die nach Verlust dieser Körperteile stirbt, wird weiter Gift ins Opfer gepumpt.

Folglich ist die erste Maßnahme beim Bienenstich: Entfernen des Stachels/der Giftblase! Dazu sollte man diese nicht zwischen zwei Finger nehmen und ziehen, da der Druck der Finger dann die Giftblase leert, sondern man sollte den Giftapparat am besten seitlich mit dem Finger “wegschnicken” oder drücken. Das klappt recht gut, allerdings gebe ich zu, dass man in der Aufregung nicht immer dran denkt…

Die Biene hat beim Stechen nicht nur den Stachel hinterlassen, sondern auch Duftstoffe, sog. Pheromone, die ihren Stockkolleginnen signalisieren, wohin sie stechen sollen. Wenn man also in der Nähe der Bienen stehen bleibt, hat man gleich noch weitere Stiche in die gleiche Körperstelle. Um das zu vermeiden, reibt man die gestochene Stelle sofort mit etwas Spucke, Wegerich oder am besten mit etwas Stark-riechendem wie einer Zwiebel.
Übrigens ähneln die Angriffspheromone stark dem Geruch einer reifen Banane. Deswegen sollte man seine reifen Bananen nicht in der Nähe eines Bienenstocks genießen!

So, nun haben wir den Stachel und die Giftblase entfernt und auch uns aus der Nähe der Bienen; wir haben den Duftstoff abgewaschen oder übertönt. Was nun?

Es gibt verschiedene Möglichkeiten: Zwiebel wird nicht nur wegen des starken Geruchs empfohlen, sondern kühlt auch und enthält wie auch Knoblauch Stoffe, die den Schmerz abbauen. Ein bisschen Zwiebel auf der gestochenen Stelle ist daher sehr angenehm.

Wegerich ist für mich die Nummer Eins beim Kontakt mit Giften: Er hilft das Gift aus dem Körper zu ziehen und kann sogar bei Blutvergiftungen helfen! Zerkaut oder zerrieben wird er auf die betroffene Stelle gelegt und wenn er austrocknet immer wieder gewechselt.

Mein Mann hat kürzlich mit der Monarde (auch Indianernessel genannt, Monarda fistulosa) gute Erfahrungen gemacht. Nach dem Motto “Die heißt auf Englisch doch bee balm – Bienenbalsam” hat er sie zerrieben und auf die Wunde gegeben. Diese ist auch schnell verheilt und auch die Schwarzfuß-Indianer nutzten sie für kleinere Wunden.

Es gibt bei Bienenstichen auch homöopathische Mittel. Das richtige Mittel hängt allerdings von den individuellen Symptomen ab:
Aconitum napellus kann angewandt werden, wenn sich der Betroffene nach dem Stich panisch oder ängstlich fühlt. Es wird sofort eingenommen, während die Symptome noch intensiv sind und kann danach durch ein anderes Mittel abgelöst werden.
Apis mellifera kann helfen, wenn die Einstichstelle geschwollen, rot und heiß ist, allerdings habe ich hier gehört, dass es nicht das beste Mittel ist, da man in der Homöopathie nicht Gleiches mit Gleichem sondern Ähnliches mit Ähnlichem heilt. Hypericum kann bei Einstichstellen, in denen viele Nerven verlaufen, das richtige Mittel sein. Die Symptome sind hier Taubheit, schießender Schmerz und Jucken.

Die “normale” Dosis ist in der Regel D30 oder C30. Angaben ohne Gewähr, am besten Rücksprache mit dem Homöopathen halten!

Ganz wichtig ist noch, dass bei einer Allergie gegen Bienenstiche sofort ein Arzt oder Krankenhaus aufgesucht werden muss! Auch für Leute, die (noch) keine Allergie haben, aber nach dem Stich Atemnot, Sehschwierigkeiten, Übelkeit oder starke Schwellungen, besonders im Atemwegsbereich haben, ist das besser.

Auf Wikipedia waren noch andere, teilweise sehr überraschende Vorschläge, wie man Bienenstiche behandeln kann, zB mit Kupfermünzen.
Hat da jemand Erfahrung? Was macht ihr?

Und nun noch das Honigkuchenrezept (ohne Eier):
500g Honig
1 Päckchen Vanillezucker
150 g Butter
1/2 Tasse Milch
2 EL Joghurt
1 Prise Salz
1 EL Zimt
1 EL Lebkuchengewürz
500 g Mehl
100 g gemahlene Mandeln
1 Päckchen Backpulver

Honig, Vanillezucker, Butter und Milch unter Rühren erwärmen (nicht kochen!); dann die Gewürze hinzugeben. Danach können der Joghurt und die Hälfte Mehl dazu. Danach werden die Mandeln, das restliche Mehl und das Backpulver verknetet.
Je nach Konsistenz noch ein wenig Milch oder Wasser dazugeben.

Der Teig wird nun auf ein gefettetes Blech gestrichen und bei 175 Grad Celsius 30 Minuten gebacken, bis er goldbraun ist.
Noch warm wird er dann in Rechtecke geschnitten und diese dürfen dann auf einem Gitter abkühlen.

Guten Appetit!

_______________________________

Since I’ve been stung a lot now that I’m a beekeeper, I’ll tell you about some remedies now.

Honey bees but also other kinds of bees like bumble bees have a stinger that they’re not hesitant to use if they feel threatened.
Luckily honey bees have been bred for tameness for hundreds of years, so they’re not too sting-happy. However, if you accidently step on one, stand in front of their entrance hole to the hive or anger them in another way, they will sting you.

Their stinger is said to have evolved as a measure against insectal enemies and can therefore be extracted easily out of an insect’s skin and reused. Unfortunately, we mammals have a much thicker skin, so when a bee stings us, her stinger rips off with part of the abdomen, muscles, nerves and all. The muscles keep working and even without the bee, which now dies from the massive injury it suffered, the venom is being pumped into the victim’s body.

Consequently, the first measure when stung is to remove the stinger! Trying to take it with two fingers and pulling results in squeezing the stinger and pumping even more venom in the body. Therefore, try to push the stinger out from the side. That works well, but I have to admit that in the excitement of the moment one often forgets….

The honey bee didn’t only leave the stinger when she stung, but also pheromones, smell agents, that tell her sisters where to sting. So if you stay close to the bees, you’ll have more stings in the same body part in no time. To avoid that you rub the stung area immediately with some spit, plantain or even better with something strong smelling like an onion.
By the way, the attack pheromones are very similar to the smell of a ripe banana. That’s why you should stay away from any beehives when enjoying a ripe banana.

Now we have removed the stinger and ourselves from the beehive; we have washed off or overpowered the scent of the pheromones. What now?

There is a multitude of possibilities: Onion is not only the measure of choice because of its smell, but also cools and just like garlic, contains agents that reduce the pain. A little slice of onion on the sting is therefore very soothing.

Plantain (Plantago) is my number one remedy when dealing with poisons: It helps drawing the venom from the body and can even be used to heal blood poisoning. Applied as a poultice and changed regularly when it dries out.

My husband has recently had good luck using monarda (Monarda fistulosa). Saying “It’s called bee balm, after all”, he used it as a poultice on his sting. The swelling reduced quickly. The Blackfoot Indians also used monarda to heal minor wounds.

Homeopathy also has its place in healing bee stings. However, the right remedy depends on the symptoms:
Aconitum napellus
can be used when the victim feels panicky or scared after the sting. It is taken immediately when the symptoms are still intense and can later be replaced with something else.
Apis mellifera can help when the sting is swollen, red and hot; however, I’ve been told that in homeopathy you use some remedy that is similar to the occasion, not the same, i.e. no apis mellifera (honey bee) for a honey bee sting.
Hypericum is useful when the sting has occurred in an area that is full of nerves like the fingertips. Symptoms are numbness, shooting pains and itching.
The “normal” dose is usually D30 or C30.
No responsibility can be taken for result (or the lacking thereof) of using any of the remedies – best ask your homeopath!

Very important: If you have an allergy to insect stings, report to a doctor or a hospital immediately! That applies also to people who have no allergy (yet), but experience trouble breathing and with their vision, have nausea or unusually big swellings after being stung and after being stung in or near the airways.

Wikipedia offers a variety of other remedies, such as copper coins.
Any experience with that? What do you do?

Beesting in German is “Bienenstich” and is a kind of cake. So for anybody who might find this page while looking for a cake recipe, here’s a great eggless honey cake recipe (but not a Bienenstich):

Eggless Honey Cake

500g honey
1 tsp vanilla extract
150 g butter
1/2 cup milk
2 tbsp yoghurt
1 dash salt
1 tbsp ground cinnamon
500 g flour
100 g ground almonds
1 1/3 tbsp baking powder
1 tbsp German “Lebkuchengewürz”, a magical spice mixture that improves any Christmas baking (depending on the brand, it consists of cinnamon, cloves, coriander, ginger, cardamom, mace, allspice, nutmeg and pepper)

Gently heat up honey, vanilla extract, butter and milk while stirring it (do not boil!); then add the spices. After that stir in yoghurt and one half of the flour. Now add the almonds, the rest of the flour, and baking powder (possibly sift flour and baking powder together beforehand) and knead well.
Depending on the consistency, add some milk or water.

Put the batter on a greased baking sheet and make it at 175 degrees Celsius for 30 minutes until golden brown.
While still warm, cut it into rectangles and cool them on a rack.

Enjoy!

Leave a comment

Filed under Animals, food, garden

Sheet Mulch II – Photos

Hier nun die versprochenen Fotos unserer neuen Sheet Mulch-Beete:

Winterliche Gartenplanung

Im Winter kann man den Garten gut planen, da ja sonst nicht so viel zu tun ist. Man sieht noch die Teile des linken Beets, die mal Stücke von unserem Bohnenzelt waren und jetzt mit als großes Beet zusammengeführt werden. Außerdem haben wir  die zukünftigen Beete mit Steinen und Holz abgesteckt, um ein Gefühl dafür zu bekommen, wie es später sein wird.

Die Beete werden mit Pappe bedeckt

Nun werden die Beete mit Pappe bedeckt

Es ist wichtig, dass die Pappe erst aufgelegt wird, wenn der Boden wieder aufgetaut ist, da der Mulch sonst den Frost isoliert und der Boden nur sehr langsam auftaut. Am besten ist es am späten Nachmittag eines warmen Tages, damit die Wärme dann durch die Pappe gehalten wird. Ein Grund, das zukünftige Beet schon im Herbst anzulegen.
Wie man sieht, haben wir in der rechten vorderen Ecke des linken Beetes schon einen Baum gepflanzt; die Pappe wird nun um ihn herumgelegt.

Und fertig!


Und schwupps sind die Beete fertig. Auf die Pappe kam ein wenig Kompost und dann eine dicke Lage von über den Winter kompostierten Holzchips. Und dann konnte das fleißige Pflanzen schon losgehen! Die dunkle Farbe des Holzchipsmulches hat im kühlen Frühjahr auch den Vorteil, dass sie die Erde stärker erwärmt. Die recyclete Öltonne im Hintergrund des zweiten Bildes wird übrigens mal eine Kartoffeltonne.

Ende Juli ist das Beet schon ein Dschungel!

Alles ist in die Höhe geschossen...

Wir waren nur zwei Wochen im Urlaub, aber als wir wiederkamen, war alles enorm gewachsen und die beiden neuen Beete hatten sich in Dschungel verwandelt.

Falls ihr auch Erfahrung mit Sheet Mulch habt, würde ich mich über Berichte und Kommentare freuen!

____________________________
Here the photos of the new beds:

Wintertime Garden Construction

Winter is a good time to plan your garden as there isn’t much else to do. In the lft bed you can still see the little bed snippets that were part of the bean tent last year and will be united in a big bed now.
Also, we put bricks and wood around the future beds to get a feel for how it will be later.

Die Beete werden mit Pappe bedeckt

Now the beds are covered with cardboard

It is important that the cardboard is put down after the ground has thawed, otherwise it insulates the frost and the ground thaws only very slowly.
It’s best to choose the late afternoon of a warm day, so that the warmth from the day is being held in by the cardboard. A good reason to make your new bed in fall before the ground freezes.
As you can see we have planted a tree in the front right corner of the left bed; cardboard will now be put around it.

And done!


And quickly the new beds are done! The cardboard was covered with a little compost and then a thick layer of woodchips that have been lefft to compost over winter. After that the planting could start!
The dark colour of the composted woodchips also makes the soil warm up more.
The recycled oil barrel in the background of the second picture will become a potato barrel.

End of July the bed has become a jungle!

Everything has grown massively..

We were on holidays for just two weeks but when we returned, everything had grown enormously and the two new beds had turned into a jungle.

If you have any experience with sheet mulch, I’d love to hear about it!

2 Comments

Filed under food, garden, Permaculture

Der schnelle Garten – Sheet Mulch

Heutzutage soll ja immer alles schnell gehen und obwohl ich dem meist wiederspreche, ziehe ich einen Instant-Garten stundenlangem Umgraben vor. Wie praktisch, dass die Permakultur da eine tolle Methode hat, das so genannte Sheet Mulching.”Sheet” ist englisch für Laken, Blatt, Platte, etc. – also ein dünner, meist rechteckiger Gegenstand. Und um es mal ganz kurz auszudrücken, geht es darum auch: Man schafft sich ein Beet, indem man die vorhandene Vegetation mit dünnen, meist rechteckigen Gegenständen, also zum Beispiel Pappe oder Zeitung abdeckt.

Vorteile und Nachteile

Natürlich ist es nicht ganz so einfach, daher erstmal ein kleiner Ausflug in die Vorteile des Sheet Mulching:

  • die Bodenstruktur bleibt erhalten, was für die Bodenorganismen von Vorteil ist
  • der Mulch verhindert Austrocknen, Erosion und Nährstoffverlust der Erde
  • der Mulch unterdrückt ungewollte Vegetation, zB hartnäckige Unkräuter wie Giersch und Efeu
  • Mulch schafft Lebensraum für Spinnen, die wiederum Schädlinge im Garten fressen
  • und natürlich spart es mir als Gärtner eine ganze Menge Arbeit

Nachteile des Sheet Mulch sind,

  • dass man nicht diesen Bloße-Erde-Effekt hat, den manche Gärtner gerne mögen
  • dass Schnecken Mulch mögen (und leider nicht von den Spinnen gefressen werden)
  • dass im ersten Jahr viele Nährstoffe in der Erde sind, was sich bei manchen Pflanzen negativ auswirken kann (Sepp Holzer empfiehlt für seine Hügelbeete, die ähnlich errichtet werden, nur Starkzehrer im ersten Jahr)
  • und dass man für die Schaffung des neuen Beets eine ganze Menge Resourcen braucht

Anwendung

Angewandt werden kann der Sheet Mulch besonders bei der Anlegung von Beeten, die mit schon vorhandenen Pflanzen bestückt werden sollen, also mit Bäumen, Sträuchern, Stauden, etc. Allerdings können auch “Problemzonen” schon vorhandener Beete mit Sheet Mulch bestückt werden.

Was braucht man?

Für das neue Beet werden grob zwei Sachen benötigt: Sheet und Mulch.

Sheets sind ja wie gesagt Pappe, Papier, Zeitung, alte Kleidung/Stoffe etc.. Besonders (unbedruckte) Pappe ist toll, weil sie recht dick ist und das Unkraut gut unterdrückt. Im Hausgebrauch hat man oft nicht genug Pappe, aber man muss sich nur mal bei größeren Firmen in Nähe umschauen und findet dort oft haufenweise alte Kartons. Tipp: Bei Fahrradläden nachfragen – die haben oft XXL-Kartons in Fahrradgröße.

Der Mulch kann fast alles organische Material sein; er wird in zwei Kategorieren unterteilt: Unkrautfrei und Nicht-Unkrautfrei.
Möchte man das neue Beet anlegen, wo schon eine Menge Vegetation ist, kann man diese einfach niederhacken/schneiden und hat schonmal eine Menge Mulch. Dieser fällt aber in die Kategorie Nicht-Unkrautfrei, da sich darunter sicher auch eine Menge Unkrautsamen und – wurzelstücke befinden, die man ja eigentlich loswerden möchte. Ebenso ist normales Stroh und Heu Nicht-Unkrautfrei, da sich darin meist noch vereinzelte Getreidekörner und Wiesenblumensamen befinden. Der ganze Nicht-Unkrautfrei-Mulch ist wunderbar als erste Lage auf dem neuen Beet, denn darüber kommt dann die Pappe (o.ä.), die eventuell neu keimendes Unkraut am Durchkommen hindert.
Unkrautfreier Mulch ist demnach logischerweise Mulch, in dem sich keine Unkrautsamen oder -wurzelstücke befinden, also Holzchips, Rindenmulch, getreidefreies Stroh (das gibt es speziell für Strohballenhäuser, aber für den Hobbygärtner ist der Besorgungsaufwand sicher nicht lohnenswert), Papierschnipsel, Zeitung, etc.

Während man die Pappe noch ganz einfach bekommen hat, ist es ein wenig schwieriger an Mulch ranzukommen, wenn man nicht schon eine Menge hat. Da hilft es, sich an Gärtnerfreunde zu wenden, zu einer Kompostierungsanlage zu fahren oder herauszufinden, was sonst im Umkreis so mit Grünschnitt/-müll passiert, und dort nachzufragen. Gartenpflege- und Baumpflegeunternehmen haben oft eine Menge Grünschnittabfälle, die sie kostenpflichtig beseitigen müssen und freuen sich manchmal über nette Gärtner, die ihnen was abnehmen.


Wie wird’s gemacht?

Das ist sicher der einfachste Teil: Man sucht sich einen Platz, an dem ein Beet entstehen soll. Dort wird vorhandene Vegetation (falls vorhanden und falls notwendig) runtergeschnitten.
Falls größere Pflanzen wie Büsche und Bäume später das Beet bevölkern sollen, pflanzt man sie am besten jetzt, um nicht hinterher wieder große Löcher in den Mulch machen zu müssen.
Außerdem sollte die Stelle vorher sehr gut gegossen werden, da die Schicht, die später Unkraut unterdrücken soll, Wasser gut aufsaugt, aber nicht so gut durchlässt.
Auf Gras und ähnlich kurze Pflanzen kann der Mulch einfach drauf gelegt werden. Genau das passiert jetzt auch: Erst kommen eventuelle Lagen von unkrauthaltigem Mulch, dann die “sheets”, also die Pappe, o.ä.
Falls schon größere Pflanzen vorhanden sind, wird die Pappe mit einem Abstand von ca. 2,5 cm vom Stamm um sie herumgelegt.
Darauf kommen dann Lagen des unkrautfreien Mulchs, Holzchips, andere kompostierbare Stoffe. Als zweitoberste Schicht kommt Kompost, dann noch eine Schicht Stroh o.ä., das Verdunstung verhindert.
Es ist gut, beim Bauen immer mal wieder alles gut zu bewässern, da dies dem Verrottungsvorgang hilft und da der Mulch wie gesagt ja auch Wasser nicht so gut durchlässt.
Legt man als oberste Schicht Stroh oder ähnlich leichtes Material, hilft Befeuchten dabei, dass es nicht wegfliegt.

Sheet Mulch muss nicht wissenschaftlich genau gelegt werden – es kann alles sei von einer Schicht Pappe mit einer dicken Oberlage Stroh bis hin zum Super-Sheet-Mulch, der 10 verschiedene Lagen in einer bestimmten Reihenfolge aufweist, … Der Fantasie sind da kaum Grenzen gesetzt und man kann sich einfach seinen Resources orientieren.

Wie wird gepflanzt?

Das Beet ist nun fertig für Pflanzen. Man kann Sheet Mulch allerdings auch im Herbst ausbringen, damit man im Frühjahr ein wunderbar kompostiertes Beet hat.

Um schon größere Pflanzen aus Töpfen zu setzen, zieht man die obersten Mulchlagen am gewünschten Platz auseinander und schneidet/hackt ein kreuzförmiges Loch mit seiner Schaufel in die Papplage. Je nach Pflanzengröße, kann der Wurzelballen entweder auf das Kreuz gesetzt werden oder man gräbt unter der zur Seite geklappten Papplage und setzt den Wurzelballen ins Loch. Die Papplage wird dann zurückgeklappt und der Wurzelballen, der in über den Papplagen liegt, wird in Erde eingepackt. Danach kann der restliche Mulch wieder zurückgeschoben und die Pflanze gegossen werden. Fertig!

Um Samen zu säen, wird auch wieder der Oberflächenmulch zur Seite geschoben, dann gibt man Erde oder Kompost auf die Papplage und darauf werden die Samen gesät. Dann gießt man und freut sich dann auf die wachsenden Pflänzchen.

Soviel zum Thema Sheetmulch – noch Fragen? Ich werde in den nächsten Tagen auch mal Bilder von unserm Sheetmulch-Beet von letztem Jahr posten.

Quellen: Eigene Erfahrung; Permaculture Design Course 2009, Aranya, Steward Wood; Sepp Holzers Permakultur von Sepp Holzer; Edible Forest Gardens von Dave Jacke, Vol. 2, pp. 402-406.

_________________________

Nowadays everything has to be fast and easy and even though I usually think differently, I’d rather have an instant garden than digging for hours. How convenient that permaculture has a great method for that, the so-called sheet mulching. To put it simply, you create a garden bed by putting down some kinds of sheets on the existing vegetation.

Advantages and Disadvantages

Of course it’s not that simple, so first of all a little digression into the advantages of sheet mulching:

  • The soil structure stays the same which is more favourable for soil organisms
  • the mulch gives the soil organisms food directly so that soil life is stimulated and they’re starting to work the soil more
  • the mulch prevents drying out of the soil, erosion and loss of nutrients
  • the mulch inhibits unwanted vegetation, such as persistent weeds like ivy and ground ivy
  • the mulch creates a habitat for spiders that will then eat pests
  • and of course the mulch saves me, the gardener, a lot of work

Disadvantages of sheet mulch are…

  • you don’t get the bare soil-look that some gardener loves so dearly
  • slugs love mulch (and sadly, the spiders won’t eat them)
  • in the first year the mulch greatly increases the amount of nutrients in the soil, which can be disadvantageous for some plants (Austrian permaculturist Sepp Holzer recommends only planting high nutrient-demanding plants in the first year in his hill beds which are similar to sheet mulched beds)
  • and that you need quite a bit of resources for the creation of your new bed

Application

Sheet Mulch can be applied especially for the creation of new beds that will later be planted with potted plants, such as perennials, trees and shrubs. But also beds for seeds or “problem zones” of existing beds can be improved with sheet mulch.
What do you need?

For the new bed you basically need two things: Sheets and mulch.
Sheets are anything flat and bio-degradable, such as cardboard, paper, newspaper, old clothes/fabric.
I like especially cardboard because it’s quite thick and smothers weeds well. Usually a household doesn’t generate enough cardboard for a big bed, but look around at companies in the area – they often have big heaps of waste cardboard boxes. A bike shop in our area has a great XXL cardboard boxes that their bikes come in!

The mulch can be any organic material and is divided in two categories: weed-free and non-weed-free.
If the spot of your new bed already has vegetation, just cut it down or shred it and you already have a lot of mulch. This is non-weed-free mulch though as it is likely that there are seeds in it and of course root bits that can regenerate.
Also in this category is normal straw or hay which usually contains a lot of seeds.
The non-weed-free mulch is a great first layer which will then be covered by the weed-smothering layer, but I digress.
Weed-free mulch is then logically mulch that does not contain any seeds or root bits, such as wood chips, bark mulch, grain-free straw (available specially for straw-bale architecture, so it’s maybe not a feasible option for small-scale gardeners), paper chips and newspaper.

While the sheets (f.e. cardboard) are relatively easy to procure, mulch is a bit more tricky. It’s useful to talk to your gardener friends, to drive to a composting plant or to find out where organic material is disposed of in the your area. Landscaping, gardening and tree caring companies often have a lot of organic waste and have to pay money to have it removed, so often they will gladly give some of their “waste” to a nice gardener.

How is it done?

This is probably the most simple part: Find a nice spot for your new bed. Cut down existing vegetation if necessary.
If you want to have bigger plants (shrubs, trees) in your future garden bed, plant them now to avoid making big holes in your sheet mulch later.
Also the spot should be watered very well now because the sheet mulch will impede the water flow later on.
Gras and other short plants can just be covered in the sheet mulch and that’s exactly what’s happening now:
First you cover your future bed with the non-weed-free mulch. Then your “sheets” that function as weed-barrier, e.g. your cardboard or whatever you have at hand.
If your bed already contains big plants such as shrubs or trees, lay the cardboard with a distance of an inch (2.5 cm) to the trunk
On top of that you put layers of weed-free mulch such as wood chips and other bio-degradable materials. Then a layer of compost and at last a layer of straw or a similar material that protects from erosion and evaporation.
While assembling your bed, it’s good to water every now and then to speed up the composting process and, as I said before, because the mulch hinders the water from going through.
If your last layer is straw or other light material, watering it will keep it from flying away.

Sheet Mulch does not have to be applied scientifically correct – it can be anything from a layer of cardboard with a thick layer of straw on top to a super sheet mulch with 10 layers in an exact order,… There are no limits to your ideas apart from your resources.

How to plant

The bed is now ready for plants. You can also use sheet mulch in fall, though, so that in spring you have a wonderfully composted bed.

To plant potted plants, just pull apart the upper lays of the mulch and cut an X into the weed-barrier using a trowel. Depending on the size of the plant, either put the root ball on top of the X or fold the weed barrier aside, dig a little deeper, put in the root ball and fold back the weed barrier. After that pack some soil or compost around the roots and push the mulch back around it. Water it and you’re done!

To plant seeds again the mulch is being pushed aside and compost or soil is added on top of the weed barrier. On top of that you plant your seeds, water them and wait for your plants to grow.

So much for sheet mulch – questions anyone? Within the next few days I’ll post some pictures of our latest sheet mulch bed.
Sources: My own experience; Permaculture Design Course 2009, Aranya, Steward Wood; Sepp Holzers Permakultur by Sepp Holzer; Edible Forest Gardens von Dave Jacke, Vol. 2, pp. 402-406.

9 Comments

Filed under garden, Permaculture

Drohnenschlacht — Drone Eviction

In der Bienenwelt geht es im Moment heiß her: Die Bienenvölker, bei denen die Königin im Sommer befruchtet wurde (oder es vorher schon war), bereiten sich jetzt auf den Winter vor und im Zuge dessen werden die Mitglieder des Volks, die man nun nicht mehr braucht, ausgestoßen: Die Drohnen.
Die männlichen Bienen, die Drohnen, erkennt man daran, dass sie wesentlich größer als die Arbeiterinnen sind und riesige Augen haben. Sie werden von Bienenforscher Jürgen Tautz in seinem Buch “Phänomen Honigbiene” als “fliegende Spermaträger” bezeichnet und das sind sie im Prinzip auch. Ihre einzige oder zumindest wichtigste Aufgabe ist es, Königinnen zu befruchten. Jeden Tag fliegen sie zu einer bestimmten Zeit aus und sammeln sich an so genannten Drohnensammelplätzen, um auf potentielle Königinnen zu warten. Sofern keine Königin vorbeikam, fliegen sie dann auch brav wieder zurück zu ihrem Volk (nach/während der Befruchtung sterben die Drohnen) und verbringen den Rest des Tages dort oder in anderen Völkern. Sie sind die einzigen Mitglieder des Volkes, die auch andere Völker besuchen können ohne zu riskieren, dass man sie zu Tode sticht. Sie werden gefüttert und eine ausgewogene Anzahl von Drohnen zu Arbeiterinnen gibt dem Volk ein Gefühl der Harmonie.
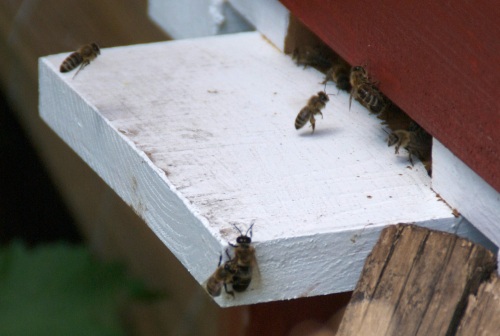
Um Juli und August herum sinkt allerdings die Wahrscheinlichkeit, dass Königinnen befruchtet werden müssen. Gleichzeitig gibt es auch weniger blühende Pflanzen, obwohl die Bienen gerade jetzt für den Winter sammeln müssen. Deswegen werden nun “nutzlose Esser” rausgeschmissen und es geht den Drohnen an den Kragen. Sie werden weniger und weniger gefüttert und man kann Arbeiterinnen betrachten, die Drohnen aus dem Flugloch zerren und versuchen, sie buchstäblich in den Abgrund zu schubsen. Die wesentlich größeren Drohnen dagegen streben wieder zurück zum Eingang. Manchmal heben sie sogar ab und versuchen, im Flug die störende Arbeiterinnen loszuwerden.
Aber selbst wenn sie es wieder in den heimeligen Stock schaffen – sie verzögern nur das Unvermeidliche…
Hier ein paar Impressionen:

Eine Arbeiterin zerrt an einem Drohn (hinten links auf dem Flugbrett)

Jetzt hängt er schon über dem Abgrund - schafft er es noch zu entkommen?

Seitlich kriechend versucht er der Arbeiterin zu entwischen...

...doch diese hält felsenfest!

Der Drohn arbeitet sich langsam wieder Richtung Eingangsloch vor.

Von den spannenden letzten Minuten habe ich leider kein Foto, aber ich kann euch berichten, dass der Drohn nochmal Glück hatte und schnell wieder in die Beute flitzen konnte.

__________________

Things are rough in the world of the honey bees at the moment: The bee colonies that have fertilized queens are preparing for winter and therefore, the less useful members of society are evicted: The drones.
The male bees, the drones, are easily recognized by being much bigger than the female worker bees and by their huge eyes. German ethologist and bee scientist Jürgen Tautz calls them “flying sperm carriers” in his book “The Buzz about Bees” and that is what they basically are. Their most important task is to fertilize young queens.
Every day at a certain time they fly out to gather at so called drone gathering places, waiting for queens. If no queen came by, the drones return to their colonies (drones die while/after fertilizing a queen) and spend the rest of the day there or at other colonies. They are the only members of the colony that can just go and visit other colonies without risking certain death by being stung.
They get fed and a certain ration of drones to workers gives the colony a sense of harmony.
Around July and August the probability of unfertilized queens decreases rapidly and at the same time the amount of flowering nectary plants sinks, even though the bees are stocking up for winter.
Therefore, “useless eaters” are being kicked out and the drones are the ones to go. They are being fed less and less to weaken them and you can watch worker bees dragging drones out of the entrance hole, trying to literally push them over the edge.
The drones, much bigger in size, however, try to get back to the entrance hole. Sometimes they even lift off and try to shake off the annoying worker bees in flight.
But even if they make it back into the homely hive – they are only postponing the inevitable…

Here are some pictures:

A worker bee is dragging a drone (back left on the entrance board)

Now he is already hanging over the abyss - will he still escape?

Crawling sideways he's trying to break free from the worker bee...

...who is holding on with all her strength!

The drone is slowly making it back towards the entrance...

Unfortunately, there are no pictures of the exciting last minutes, but I can assure you that the drone was luckily enough to escape back into the hive.

Leave a comment

Filed under Animals

Sonnenstrahlen sammeln – Catching Sun Rays

Ich mags gerne bunt und gerade an grauen Wintertagen sind erhellen kleine Sonnentrahlen das Gemüt. Meine Sonnenstrahlen finde ich im selbstgemachten Haustee.

Wie das geht? Jetzt im Sommer blühen alle möglichen Pflanzen, deren bunte Blüten getrocknet den Haustee optisch aufpeppen. Hierzu sammelt man essbare Blüten oder Blütenblätter von zum Beispiel…

Malve

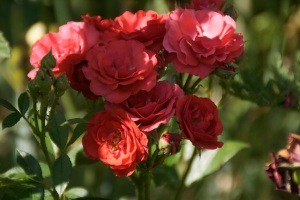
Rose

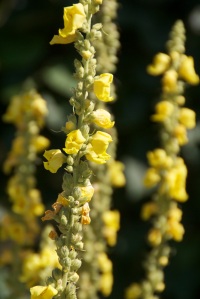
Königskerze

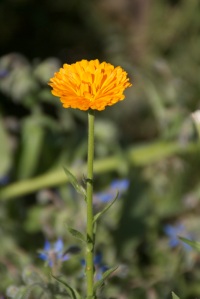
Ringelblume

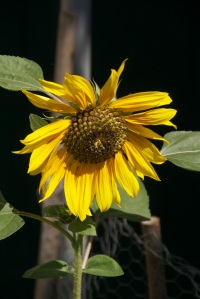
Sonnenblume

Wegwarte

…und weitere essbare Blüten.
Die Blütenblätter oder Blüten werden dann im Schatten getrocknet. Ich nehme alte Papp-Obststiegen (kostenlos und stapelbar!), deren Böden ich zum Teil mit Fliegennetzen ersetzt habe, um bessere Luftzirkulation zu gewährleisten. Die Farben der Blüten bleiben erhalten (wenn man sie in der Sonne trocknet, bleichen sie aus!) und wenn sie richtig trocken sind, kann man sie in beschriftete Behälter (z.B. Schraubgläser) umfüllen.
Ob sie trocken sind, verrät ein einfacher Test: Sind die Pflanzenteile noch biegsam, müssen sie noch mehr trocknen. Zerbrechen oder zerbröseln sie hingegen einfach, sind sie trocken genug.
Man kann die Blüten einfach in den Schwarztee mischen, in dem die bunten Farben einen schönen Kontrast bilden oder man mischt sich einen Haustee zusammen. Ich nehme für meine Hausteebasis Pfefferminze, Zitronenmelisse, ein wenig Salbei und Zitronenverbene. Alles gut vermischt und dann kommen die Blüten hinzu.

Fertig ist der Sonnenstrahlentee für gute Laune im Winter!

P.S.: Für nächstes Frühjahr schonmal vormerken: Veilchen-, Holunder- und Lindenblüten machen sich auch wunderbar im Tee.

___________

I love beautiful colours and especially on grey winter days little colourful sun rays lighten the mood. I find my sun rays in my homemade tea mixture.

How that works? Now that it’s summer lots of plants are flowering and their beautiful flowers can be dried and used to visually enhance your own homemade tea.
Just collect edible flowers or flower petals of local plants such as…

Malva

Rose

Mullein

Calendula

Sun flower

Chicory

…and other edible flowers.

The flowers or petals are then dried in the shade. I use old cardboard boxes that have been used for transporting fruit to stores (free and stackable!) and some of them I modified the floor to have a fly screen for better air circulation.
The colour of the flowers stay if you dry them in the shade – in the sun they bleach!
When they are completely dry, they can be put into labeled containers (I use glass screw top jars).
If they are completely dried you can find out with this simple test: Are the plant parts still bendy? Then they’re not dry enough! Do they crumble and snap? They are dry enough!
You can mix your flowers into black tea for a wonderful contrast of the black and the colours or you make your own tea mixture: For a base I use peppermint, lemon balm, a little sage and lemon verbena.
Mix it well and then add your flowers.
There you go – your own sun ray tea for a good mood in winter!

P.S.: For your spring to-do-list: Violet, elder and linden flowers are also wonderful in tea!

1 Comment

Filed under food, garden